

- Introduction
- The Entire Lumphini Park View
- The Reflections of One Bangkok
- The Street lights around One Bangkok
- Other Areas
- Conclusion
- Disclosures
Introduction
Dusit Central Park officially opened on September 3rd, 2025 and has become a popular spot for photographers. From the rooftop park, you can view amazing views of Lumphini Park and One Bangkok. These are perspectives that were previously only accessible from specific hotel rooms such as, SO Hotel, Bangkok.
In the past, getting these views meant booking an expensive room for a single night. Now, you free have access to these views.
In this post, I will guide you through some of the best photographic locations in Dusit Central Park. For each spot, I walk you through my shooting process in detail and how I edited them.
My Camera Equipments
I use the following gears for this set of photos. You don’t need identical gear to achieve similar results. This is simply what worked for me
- Camera – Sony A7CII
- Camera Lens
- FE-PZ 16-35mm F4 G
- FE 28-70mm F2 GM
- FE 70-200 Macro F4 G OSS II
- Camera Tripods
- K&F Concept K254A3 – Any tripods with good height extension and wind resistance should do the job as well.
- ND/CPL Filters – A variable ND filter (ND 2-32) should be enough. If you have one, bring ND 1000 can be useful in very bright conditions.
- K&F Concept NANO-X ND 2-32
- K&F Concept NANO series MCUV & CPL & ND1000
- K&F CONCEPT SNJ51T/SN25T1 Square Filter Set
- Rotatable Mount Plate Kit –
- Ulanzi S63 Claw Rotatable Horizontal to Vertical Mount Plate Kit. They are very useful for different purposes. We will discussed this later on.
Getting There
Dusit Central Park is accessible BTS Skytrain and car.
This place is best photographed during the morning golden hours. Therefore, taking a taxi or driving is recommended. The BTS begins operation at 6:00 AM, which may be too late for certain lighting conditions.
Once you’ve arrived, take the elevator by Starbucks to the 6th floor. It’s a good idea to scout the location beforehand.The entrance can be confusing when the department store section is not open yet.
The Entire Lumphini Park View

FE 28-70 F2 GM
f2, ss 1/400s , ISO 100
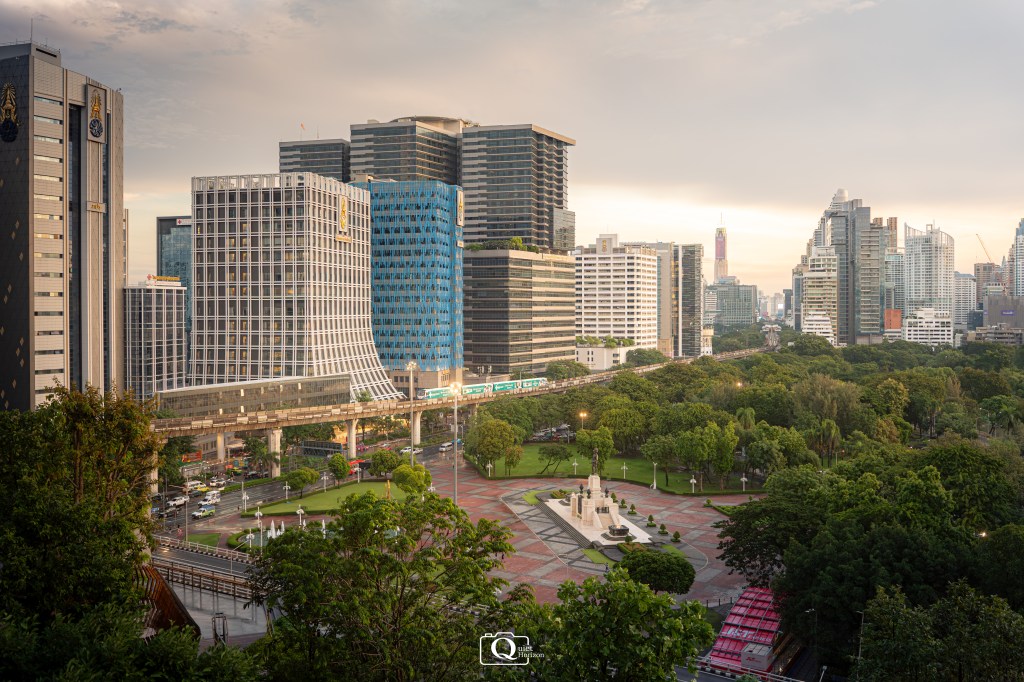
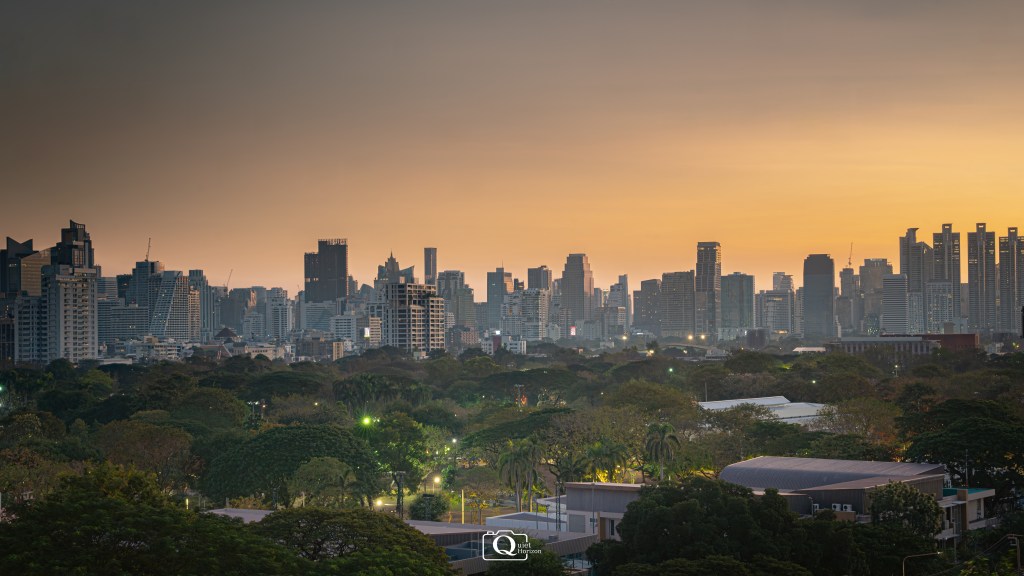
This is the main viewpoint if you want to see Lumphini Park in its entirely.
After exiting the elevator, turn left and walk straight ahead. No need to take the stairs. The view opens up naturally in front of you.
From this spot, the park stretches across the frame, balanced by the surrounding buildings – a classic Bangkok city-park composition
Best Time for taking this Photo
The best time to shoot this view is between 7:00 and 8:00 AM, when the sun is higher but still soft. The light at this hour creates a warm morning atmosphere without harsh shadows.
This timing gives the scene a calm energy that works especially well for wide cityscapes.
Techniques for taking this Photo
This shot works as a single shutter image.
Use the buildings as your main subject, place them at the center of the frame. Let the trees act as foreground. The guide the viewer’s eye towards the buildings.
Here I use:
- FE 28-70 F2 GM with
- Focal Length = 35mm
- Aperture F = 2
- Shutter Speed = 1/400 seconds
- ISO = 100
Here is another viewpoint of Lumphini Park.
Sony FE 28-70 F2 GM
f2, ss 1/400s, ISO 100
From this angle, place the blue building slightly left of center. The red walk way acts as a leading line, directing attention straight toward the blue building.
Strong color contrast makes the subject stand out immediately, forcing the viewer’s eye to lock onto it.
Notice that there is a BTS station on the top right hand corner. When you focus on that area, the photo shifts from a park scene to a pure city narrative.
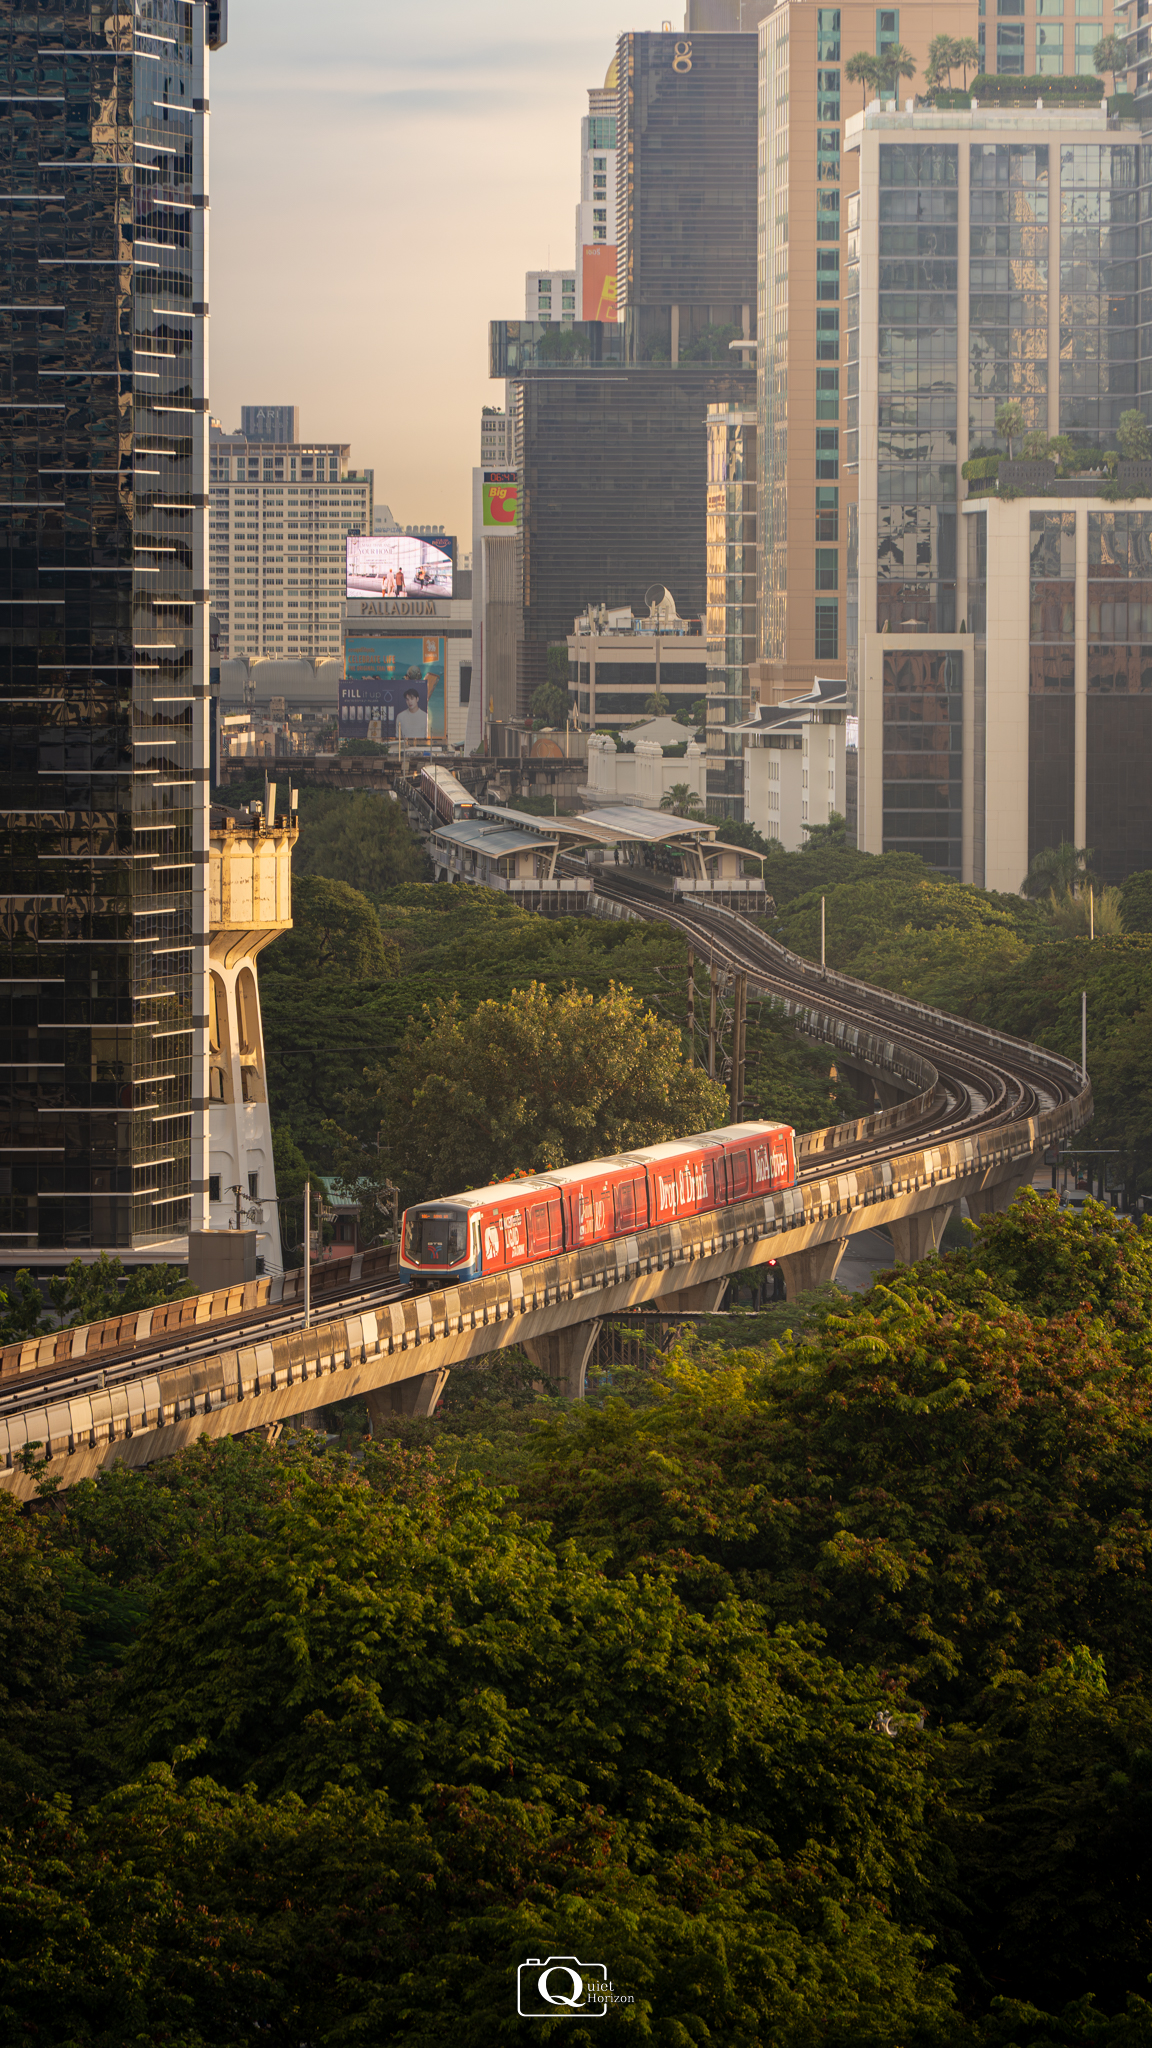
Sony FE 70-200 Macro F4 G OSS II
f4, ss 1/200s, ISO 100
Switch to continuous switching mode and hold the shutter as the train moves through the frame. From that sequence, select the frame where the train just clears the corner. This delivers the strongest sense of motion and city energy.
From this distance, the train isn’t moving fast relative to your position, so a shutter speed of 1/200 seconds is sufficient.
Editing Process
You want to edit your photo by making it look more warm to emphasize morning light. Apply subtle brightness shade of light from top right hand corner to the main subject while lowering exposures in less important areas. This makes the subject stand out.
The sky is often overexposed in morning city shots. Reduce highlights and brightness in the sky to recover details and balanced overall image.
The Reflections of One Bangkok

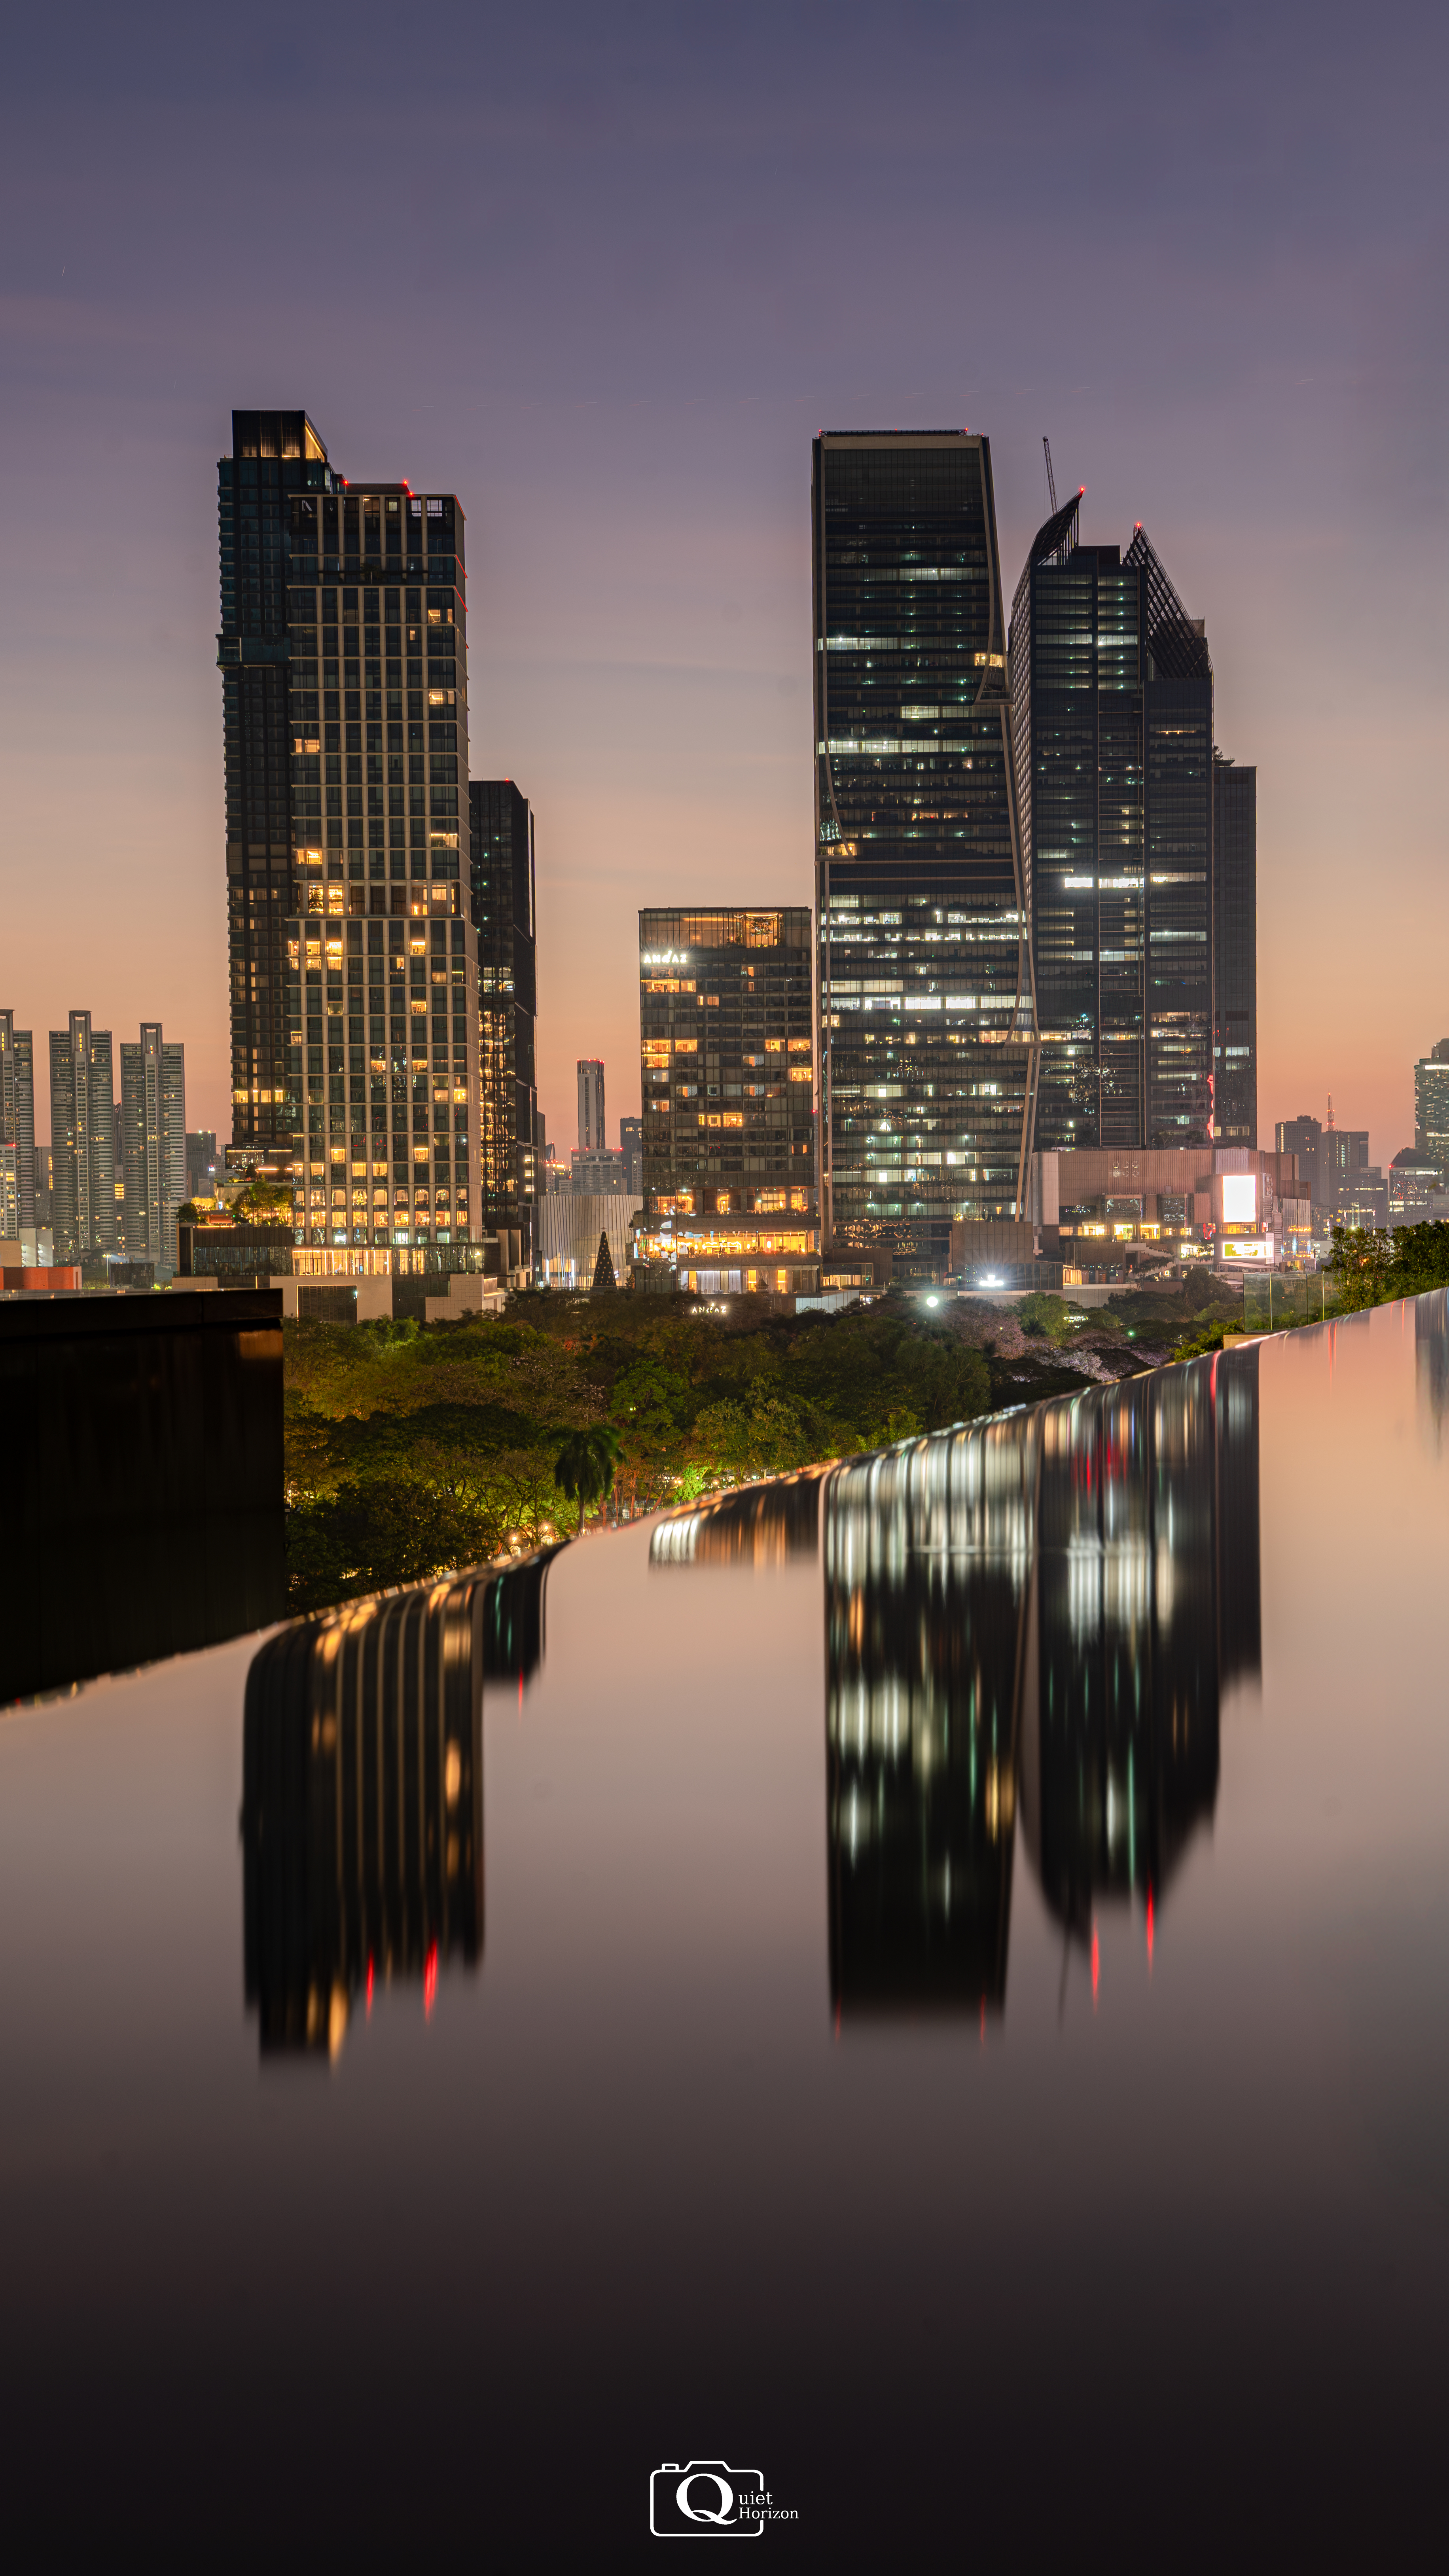
Sony 28-70 F2 GM
f11, ss 30s, ISO 100
This is one of the best locations for photographing reflections of One Bangkok. Look for a rectangular pool of water. When you’re standing in front of it, there should be:
- Stairs going down on your left less than a meter away
- Food stalls on your right, no more than two meters away.
- Seating areas sit directly beside the pool
Best time to take this photo
This photo works best during the golden hour just before sunrise. At this moment:
- The sky show strong color contrast
- Lights from Lumphini Park and One Bangkok are still on
The mix of artificial light and early morning sky creates a richer reflection.
Aim to take this photo during December to January period since you have a better chance to clearer sunrise conditions.
Techniques for taking this photo
Use the pool as a mirror. Lower the camera to the water level and keep it close to the surface. Arrange it so that One Bangkok is at the right side of the frame.
This shot relies on long exposure technique to smooth the water surface. Wait for calm conditions – wind disturbs leaves and breaks the reflection. Here I use:
- FE 28-70 F2 GM with
- Focal Length = 28mm
- Aperture F = 11
- Shutter Speed = 30 seconds
- ISO = 100
- ND Filter (varies by light conditions)
ND filter is important here. A 30 seconds exposure without ND filter would overexpose the image.
Here is where my mount plate kit is useful here. With this mount plate, you are able to place the camera closer to the water surface and maintain stability while taking long exposure photos. If you don’t have one, a tripod works as well.
This composition also works in portrait orientation.Both horizontal and vertical frames offer different visual strengths, it depends on what you prefer.
Sony FE 28-70 F2 GM
f11, ss 30s, ISO 100
If you hate getting up early, you can take this photo during night time as well. The reflections are still strong however, you will lose the sunrise element.

Sony FE 28-70 F2 GM
f11, ss 30s, ISO 100
To my knowledge, this place is best for taking reflection photos because the water is still. Here are some examples of reflections I taken here.
Sony FE 70-200 F4 Macro G OSS II
f4, ss = 1/1000 sec, ISO = 100

Sony FE 28-70 F2 GM
f11, ss 1s, ISO = 100
Note that these two examples were taken when the sun is a lot higher because the lights of the buildings aren’t the main point of interest anymore. It is up to your imagination how you want to use reflection to compose your photo.
Looking at the full set of One Bangkok buildings, a small building sits between two much larger ones. By placing that small building as a subject, the surrounding buildings naturally frame it, creating a strong leading structure towards the subject. Bright sky adds rim light along the edges, making the image more dramatic. This composition is shown in Example 7.
Example 8 is a great reflection spot of the entire Lumphini Park view. Although this pool doesn’t produce a full reflection due to its angle, but it still delivers a compelling composition. Imperfect reflections can still be powerful.
Entire Park View from Reflection Spot
You can also take the whole Lumphini Park View shot at the location as well. The procedure is still the same as when taking photos of the entire park.
Sony FE 28-70 F2 GM
f11, ss 30s, ISO 100
Editing Process
Editing process here depends on the time of the day.
For early morning shots (Examples 4-6)
- Increase exposure slightly
- Reduce highlights to generate details
- Let building lights be the highlight of the photo
Don’t add shade of light on the subject here unless it is too dark. Use the building structure and the light itself to make it stand out.
Once the sun is fully up, follow the same editing approach used for daytime cityscape shots.
The Street lights around One Bangkok
Sony FE 28-70 F2 GM
f11, ss 30s, ISO 100
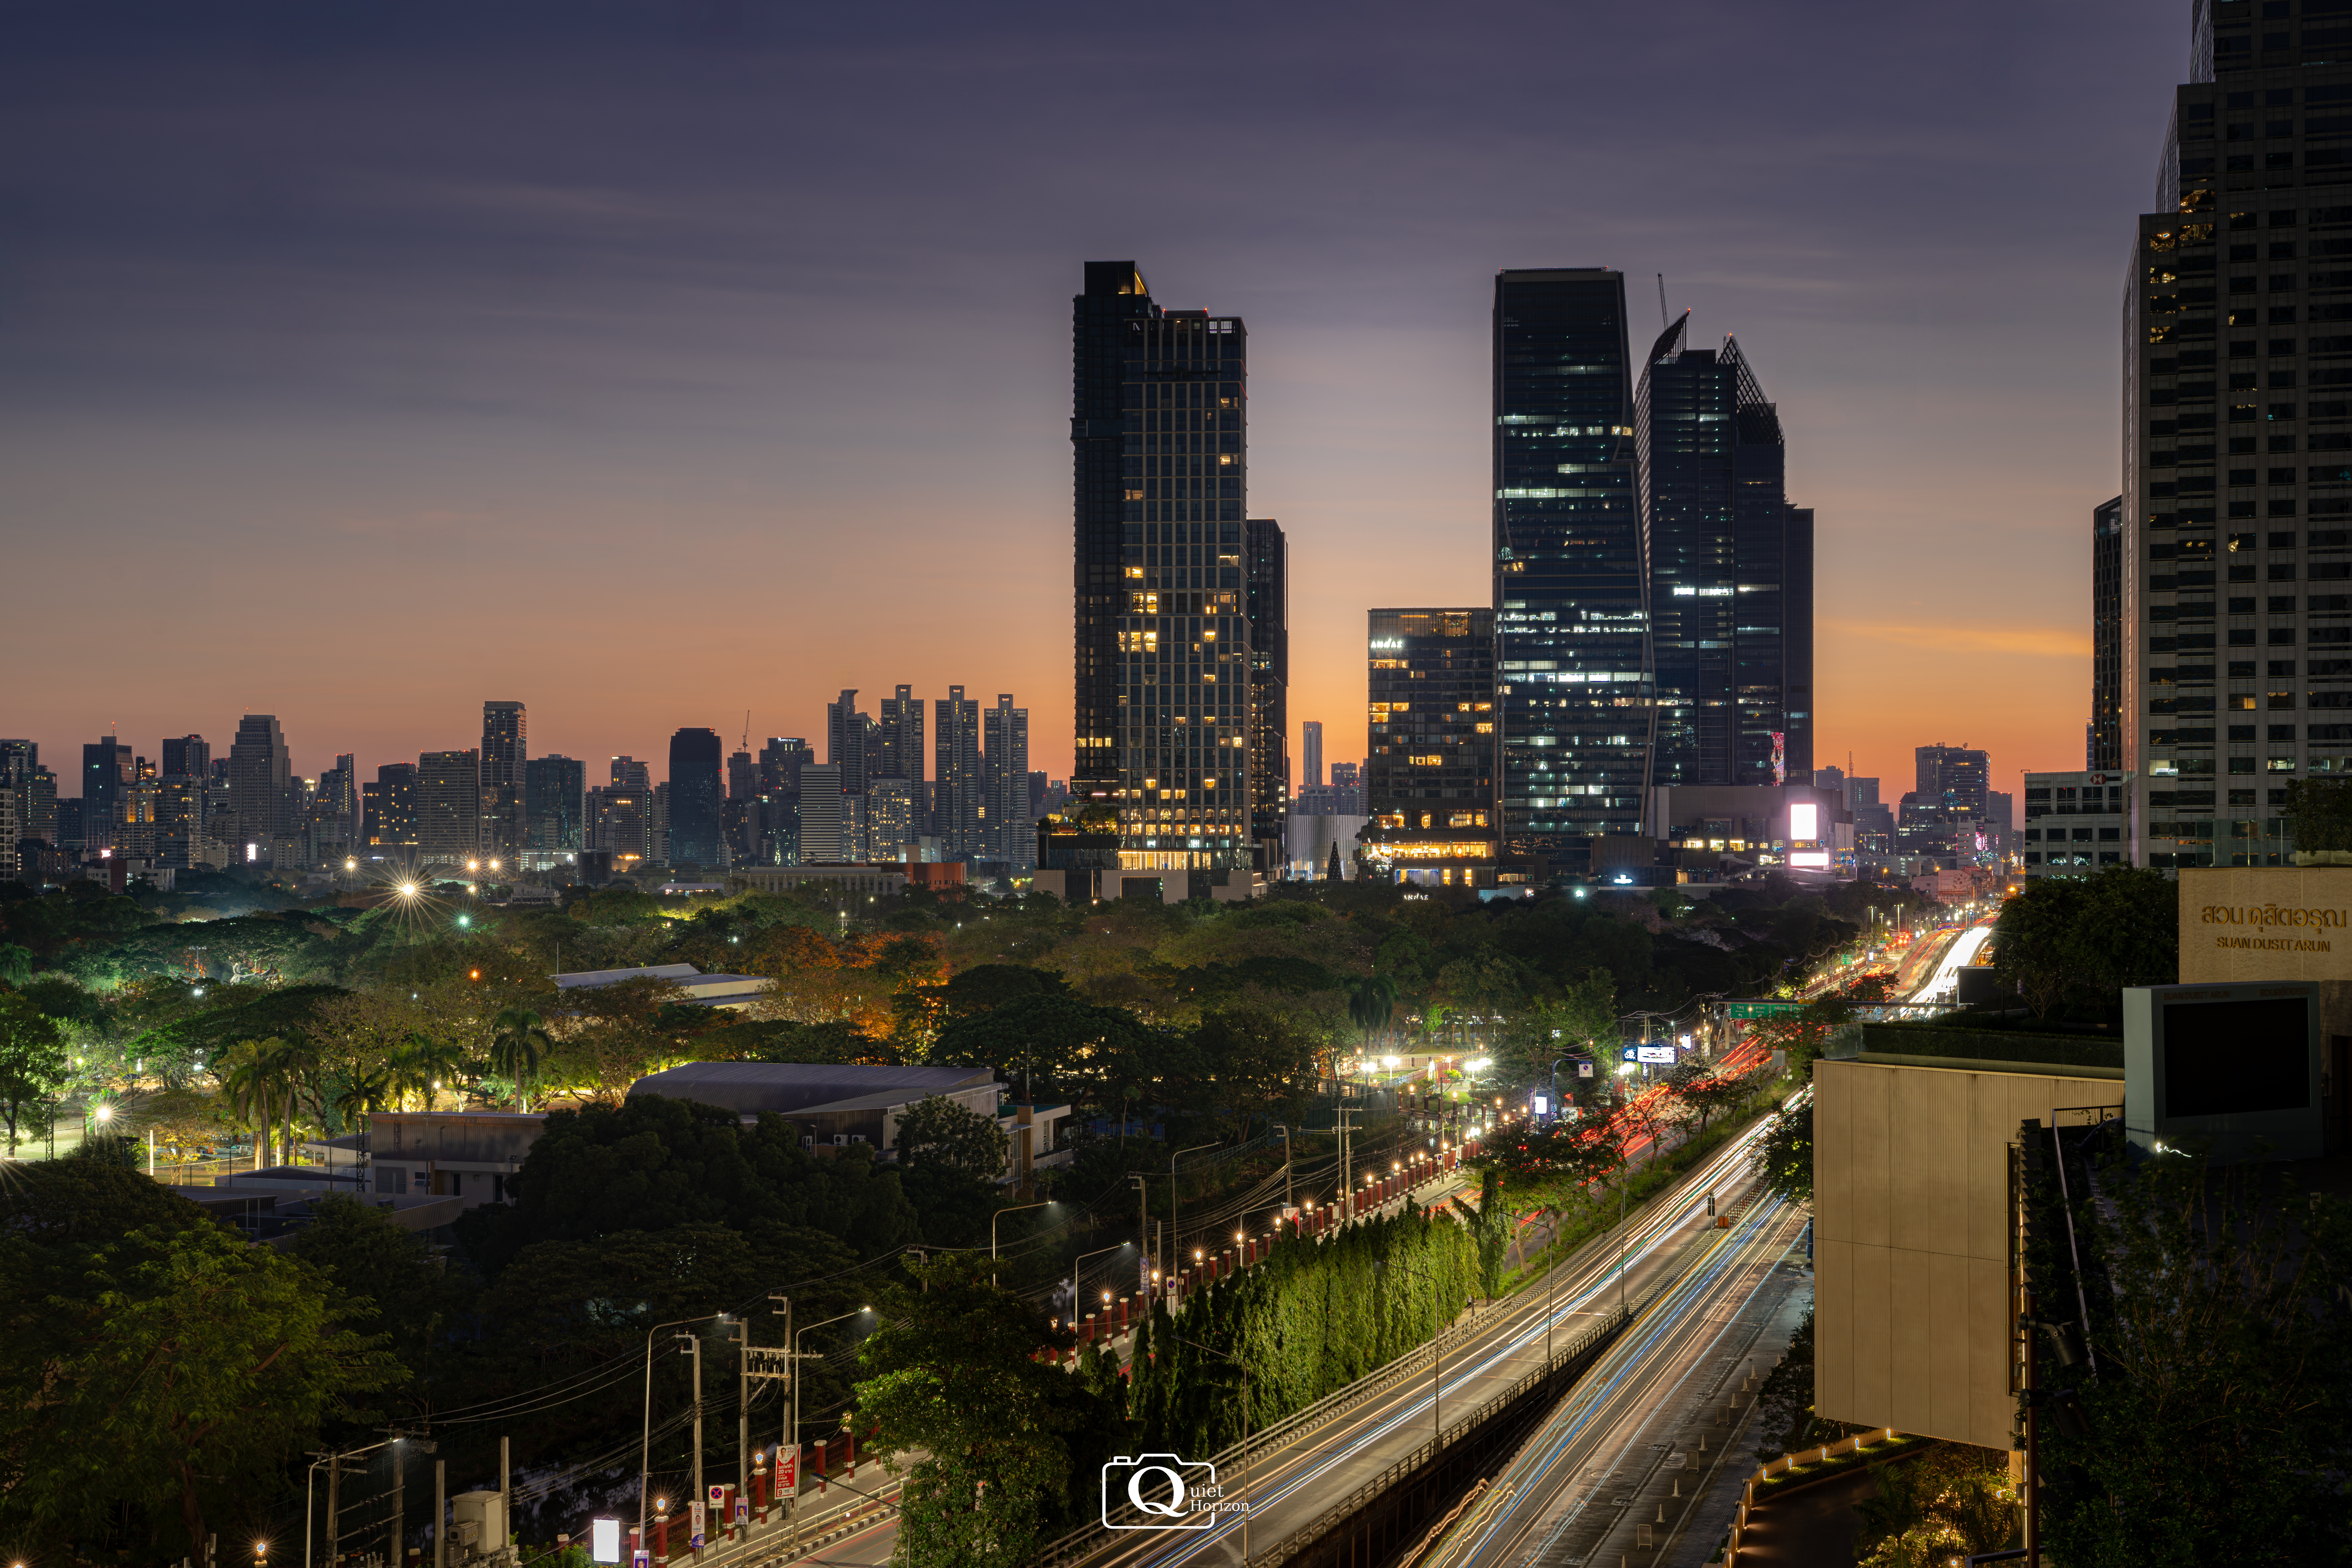
From the previous spot, walk down the stairs on your left and turn left. This area opens up multiple roads leading to One Bangkok.
This location works especially well for capturing the contrast between city infrastructure and early morning light.
Best time for taking this photo
As with the previous shots, aim for the early morning golden hour.
At this time:
- Building and street lights are still on
- The sky begins to brighten
- Light trails from passing cars add energy to the scene
The combination of artificial light and sunrise color gives this image its impact.
Techniques for taking this photo
Set up the camera on a tripod there. A mounting plate sits too low for this angle, so proper height and stability are important.
Compose your frame so that One Bangkok is in the top right portion of the image. This allows the roads to lead the viewer’s eye toward it. I use the following camera settings:
- FE 28-70 F2 GM with
- Focal Length = 37mm
- Aperture F = 11
- Shutter Speed = 30 seconds
- ISO = 100
- ND Filter (varies by light conditions)
- Tripod
Long exposure is necessary here. It transform moving cars into flowing lines of light, while building lights are clear. The visual focus here is the interaction between building lights and traffic movement.
Night time photography here is also a valid option.
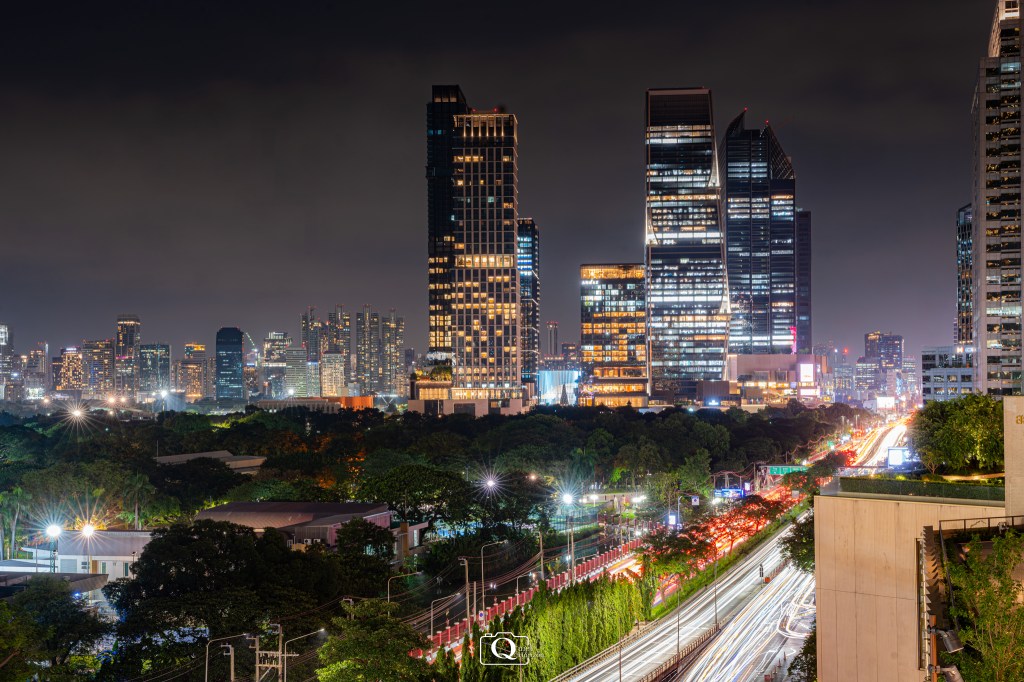
Sony FE 28-70 F2 GM
f11, ss = 30, ISO = 100
Editing Process
The editing approach is similar to the reflection shots, but with one key adjustment.
Increase the brightness of the green foreground areas. These elements prevent the image from being too dark. It balances the bright buildings and light trails.
Other Areas
The locations above are my primary shooting spots, but they’re not the only ones worth exploring.
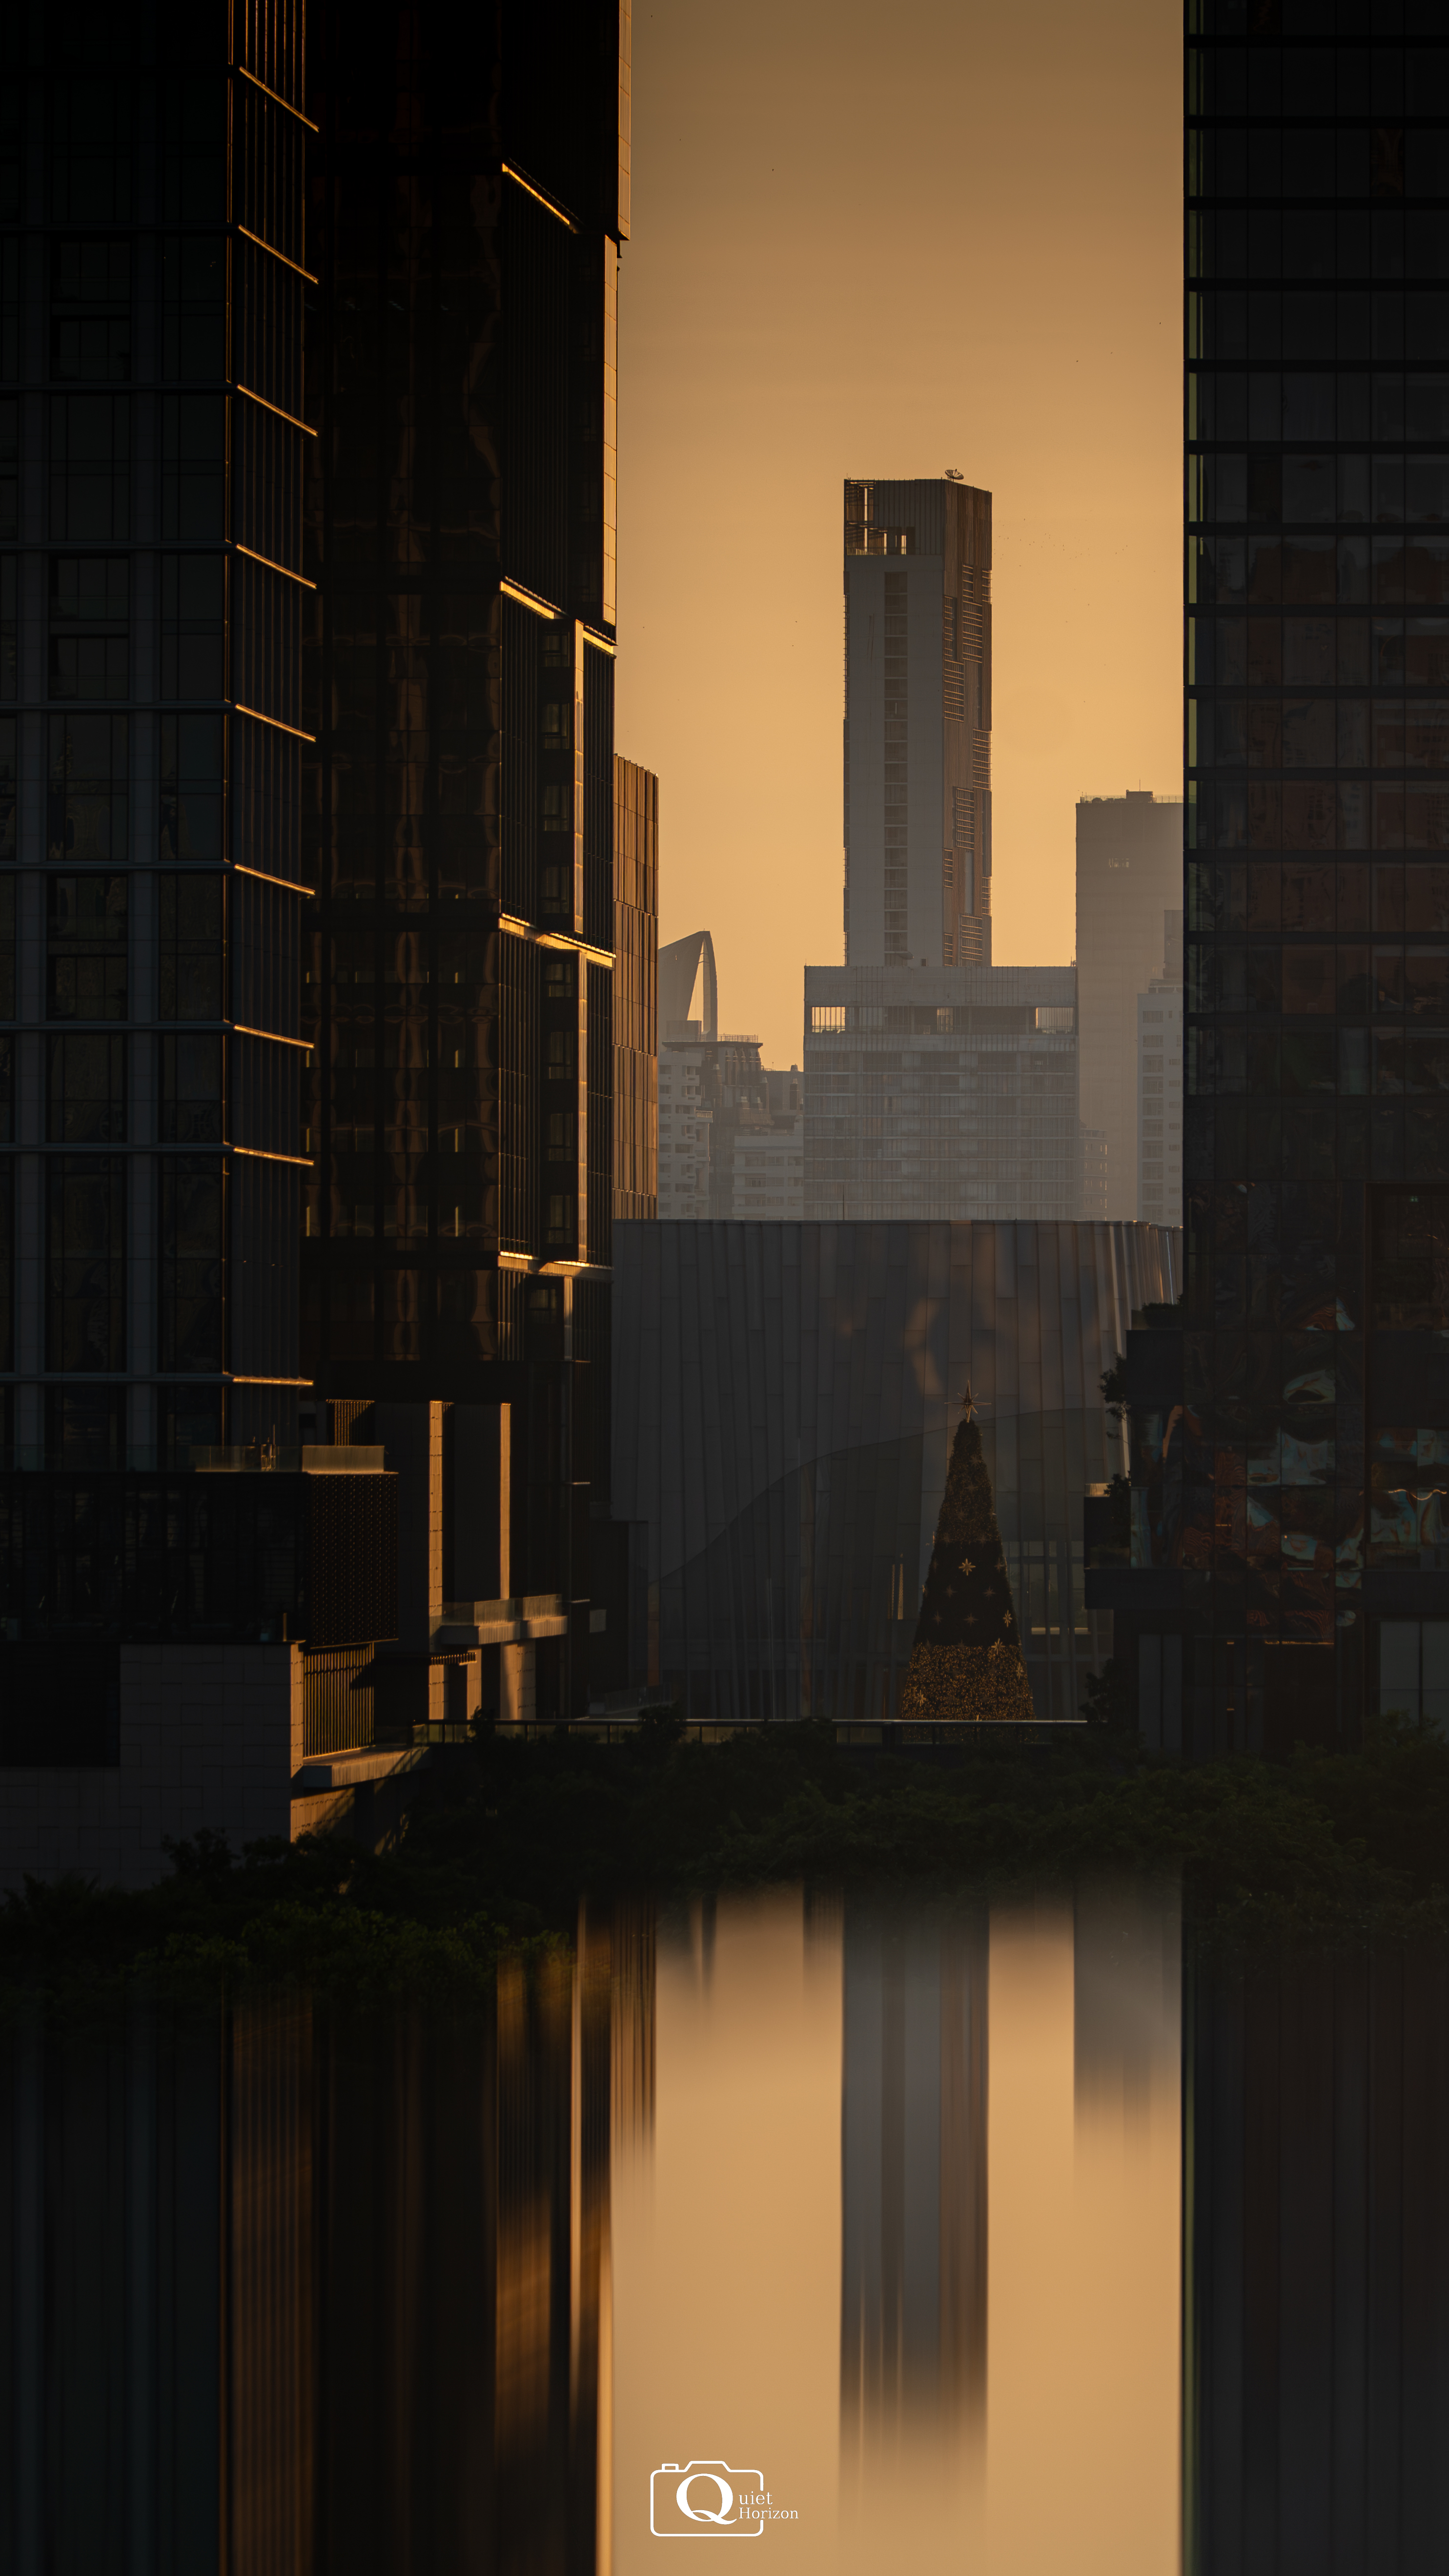
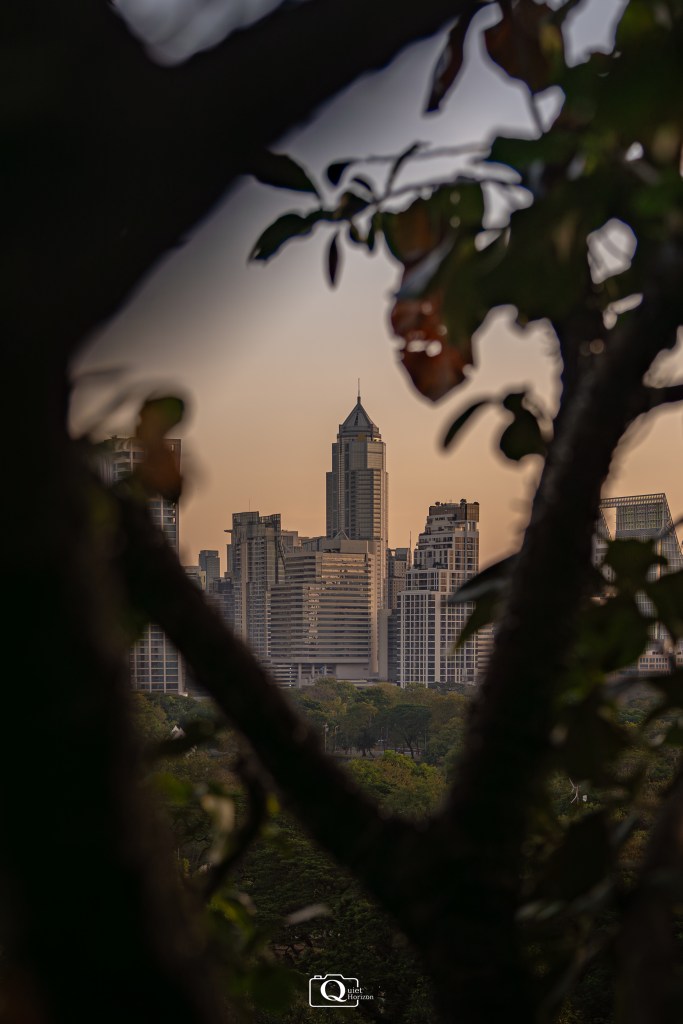
From the main walkways, look for staircases leading upward into the sky garden. From there, you can photograph the garden itself or use the surrounding trees as natural frames for nearby buildings.
Branches and leaves work especially well for creating depth. Instead of showing the entire skyline, let the greenery partially block the view and guide attention toward a specific structure. These framed compositions often feel more intimate and deliberate. Here’s an example
Sony FE 28-70 F2 GM
f2, ss = 1/400s ISO = 100
In this shot, the trees act as a foreground frame, enclosing the buildings behind them. This draws the viewer’s attention towards the building while making the city feel contained rather than overwhelming.
Conclusion
Cityscape views are difficult to access. Without drones or private access to high-rise condos, most photographers never get close to them.
Dusit Central Park changes that. It offers open, public access to cityscape perspectives that are usually locked behind privilege or permission.
As a photographer, this is a place worth visiting. Take your time, explore the angles, and use the techniques in this guide to create images that feel intentional and cinematic. Opportunities like this are rare — make the most of them.
Disclosures
AI tools were used to assist with outlining, clarification, and editing suggestions.
All ideas, interpretations, and final writing decisions are my own.

Leave a comment